KB-Racing Speedwheel untuk Vespa GTS 300 HPE
Di sini kami sudah memperkenalkan
Speedwheel untukmu. Hari ini kami akan melihat lebih dekat produk terbaru dari KP-Racing dan menunjukkan kepadamu dalam panduan pemasangan bagaimana Speedwheel dipasang pada Vespa-mu. Dengan komponen kecil dan cerdas ini,
speedometer GTS dikalibrasi. Efek samping yang menyenangkan: GTS berjalan
sekitar 10 km/jam lebih cepat. Jadi, jika speedometer menunjukkan 130 km/jam, kendaraan sebenarnya berjalan dengan kecepatan 130 km/jam. Kecepatan normal dari speedometer yang berlebih 10 km/jam akan terkompensasi. Speedwheel menggantikan cakram nada asli pada ABS. Dengan pengaturan permukaan sinyal yang berbeda, ABS menerima sinyal yang benar untuk mendeteksi kecepatan. Karena model HPE dibatasi bukan oleh putaran mesin, melainkan oleh kecepatan, putaran mesin akan meningkat hingga skuter mencapai 130 km/jam dan masuk ke soft-limiter.
Uji Coba di Scooter Center Dyno +11km/jam
Di dyno kami, kami telah menguji KB Speedwheel untuk melihat apakah perbedaan tersebut benar-benar dapat diukur. Setelah pemasangan Speedwheel, ABS harus dikalibrasi ulang. Tugas kecil ini sangat mudah dilakukan dalam beberapa menit. Sayangnya, peningkatan kecepatan tidak bisa terdeteksi melalui speedometer di jalan. Speedometer tentu saja masih menunjukkan 130 km/jam, jadi hanya uji jalan dengan perbandingan GPS atau dyno yang dapat memberikan kejelasan. Dan benar-benar: setelah pemasangan Speedwheel, HPE 300 Tech kami
berjalan 11 km/jam lebih cepat daripada sebelum beralih ke KB Speedwheel!

Pesan Speedwheel-mu di sini
Catatan: Meskipun pemasangan Speedwheel cukup mudah, kami menyarankan agar pemasangan dilakukan oleh bengkel yang berkompeten.
Instalasi KB Speedwheel:
PERHATIAN: Lakukan pekerjaan hanya pada mesin yang dingin!
Pastikan kendaraan diletakkan pada permukaan yang rata dan di atas stand utama!

Daftar Alat
- Roda pas 1/2 dengan SW17, SW24, IS4, IS6, TX40
- Roda pas 1/4 dengan SW8, TX20
- Gunting kabel
Daftar Bahan
1) Melepas Knalpot
Diperlukan roda pas dengan kunci SW17 dan TX40. Lepaskan baut pada klem knalpot dengan SW17. Lepaskan tiga baut pada tubuh knalpot dengan TX40. Lepaskan baut terakhir di kiri atas hanya setelah knalpot ditahan ke bawah dengan tangan. Ini mencegah kerusakan pada pipa dan kebocoran gasket pipa. Untuk kendaraan dengan jarak tempuh yang lebih tinggi,
kami sarankan untuk langsung mengganti Gasket Pipa Vespa GTS.
2) Melepas Sensor ABS
Diperlukan roda pas 1/4 dengan TX20 dan soket SW8. Karena sensor ABS bersifat magnetik, mungkin ada sisa-sisa logam dari sistem rem di area sensor. Sisa ini dapat dengan mudah dibersihkan dengan kain. Kabel dan sensor rentan terhadap kerusakan mekanis, jadi pastikan untuk tidak merusak sensor atau kabel selama proses ini.

3) Melepas Swingarm
Lepaskan mur dudukan suspensi dengan SW17. Lepaskan mur, washer, dan suspensi dari dudukan. Rangka kendaraan akan turun beberapa milimeter, yang normal dan tidak masalah. Lepaskan dua baut depan pada swingarm dengan IS6 dan tarik keluar. Perhatikan urutan washer dan spacer. Gunakan pemotong sisi yang sesuai untuk memotong kepala pin dari mur poros utama, tarik ujung yang tersisa keluar dari poros utama dan lepaskan penutup pengaman. Lepaskan mur poros utama dengan SW24. Lepaskan mur dan spacer di bawahnya. Lepaskan swingarm dari poros utama.
4) Melepas Tonwiel
Lepaskan tonwiel asli dengan IS4. Saat melepas baut, perhatikan agar ring jarak tetap pada tempatnya.
PERHATIAN! Tergantung pada kondisi model, baut tonwiel dapat memiliki pengamanan yang lebih kuat. Jika baut tidak bisa dilepas langsung, maka roda harus dilepas dan dipanaskan dari dalam pada area baut tonwiel dengan hair dryer untuk melepaskan pengaman baut. Jika baut baru diperlukan, gunakan artikel
Baut 1667152 atau
Baut 1271147 bersama dengan
Pengaman Baut 7676902.
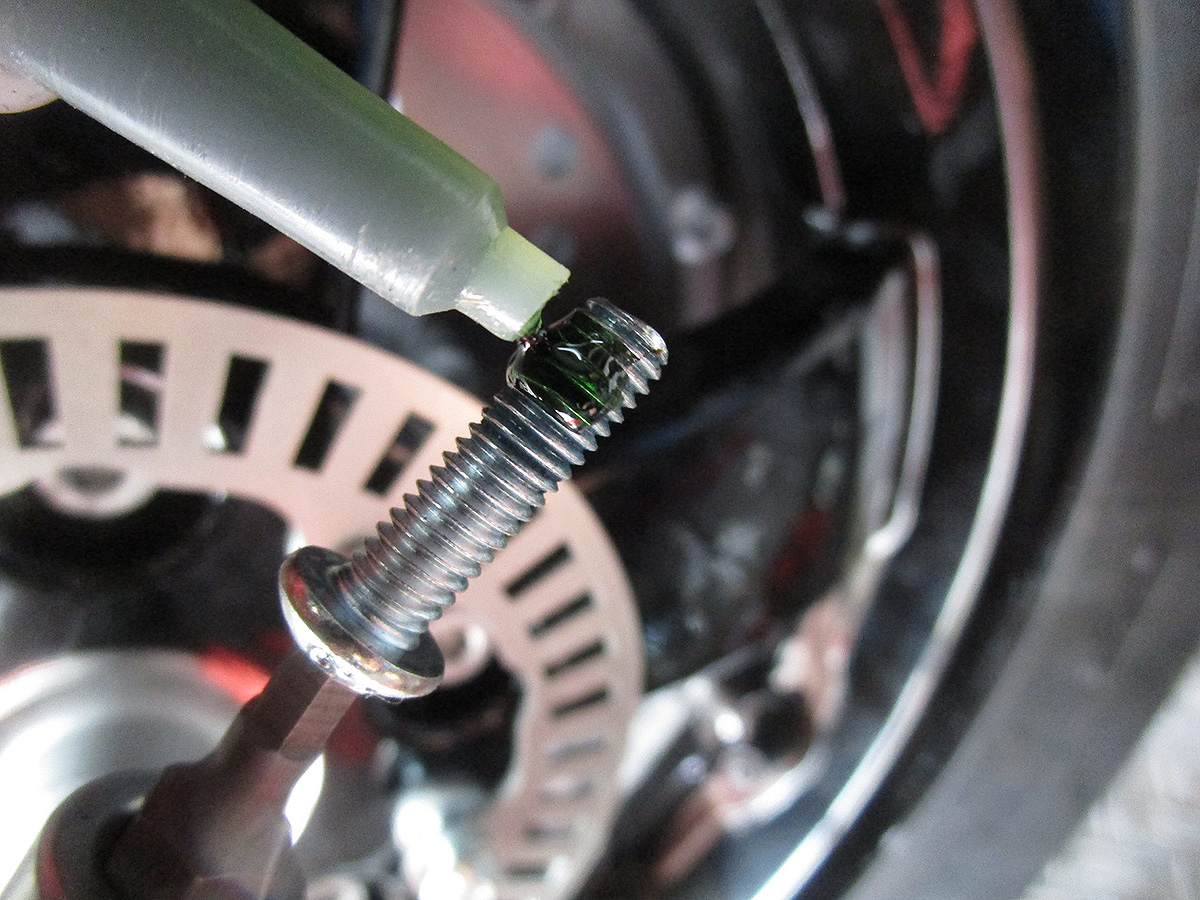
5) Memasang Speedwheel
Pasang Speedwheel bersama dengan ring jarak pada pelek. Jika baut baru diperlukan, gunakan artikel
Baut 1667152 atau
Baut 1271147 bersama dengan
Pengaman Baut 7676902.

Pemasangan selanjutnya dilakukan secara terbalik. Pengaman mur roda belakang harus diamankan dengan pin baru 3,5 x 32 mm.
Instruksi Pemasangan dan Torsi yang Harus Diikuti
- Baut Tonwiel/Speedwheel, IS4 = 10-12 Nm*
- Mur roda belakang SW24 = 104-126 Nm
- Baut swingarm pada dudukan mesin IS6 = 20-25 Nm (PERHATIAN! Kencangkan mur roda belakang setelah mur dipasang)
- Mur dudukan suspensi SW17 = 40-45 Nm
- Baut sensor ABS SW8 dan TX20 = 4-5 Nm*
- Baut pada tubuh knalpot TX40 = 20-25 Nm
- Baut klem pada krukknalpot dengan SW17 = 16-18 Nm
Catatan dengan *: tidak ada pengukuran resmi dari Piaggio. Nilai-nilai ini diambil dari tabel DIN.
Pada saat pemasangan, garansi mungkin akan batal.
Speedwheel tidak disetujui untuk digunakan di jalan raya.
Penggunaan di jalan raya akan membatalkan sertifikasi tipe kendaraan.
Pesan Speedwheel-mu di sini
SC-Blog: 10km-h-speedwheel-vespa-gts-tuning-fuer-gts-hpe-300/
 DE | €
 pesan online super mudah sekarang!")

 - Vespa GTS MP3 HPE 310 (2024-) pesan online sekarang!")


